Chapter 10 — Beginner Mode
Beginner Mode (Simple Mode, Cmd+1) is the guided workflow for anyone reconstructing a 3D Gaussian Splatting scene for the first time. Instead of showing a sidebar full of Inspector fields, the app walks you through four steps: first import images or a video and choose a quality Preset, then processing runs (SfM + training), after that the finished scene can be reviewed in a 3D preview, and finally it's exported to the format of your choice. A step chain in the bar at the top of the window shows where you currently are.
Compared to Expert Mode (Cmd+2), which shows all panels at once, Beginner Mode hides unused options, shows validation warnings when there are too few or poor-quality images, and offers only the buttons that make sense in the current state at each step. You can switch between Beginner and Expert Mode at any time (Cmd+1 / Cmd+2) — the entire state, including imported images, the selected Preset, a training run in progress, and the finished point cloud, is preserved and immediately available in the other mode.
Z1 — Import (Choose Images & Preset)
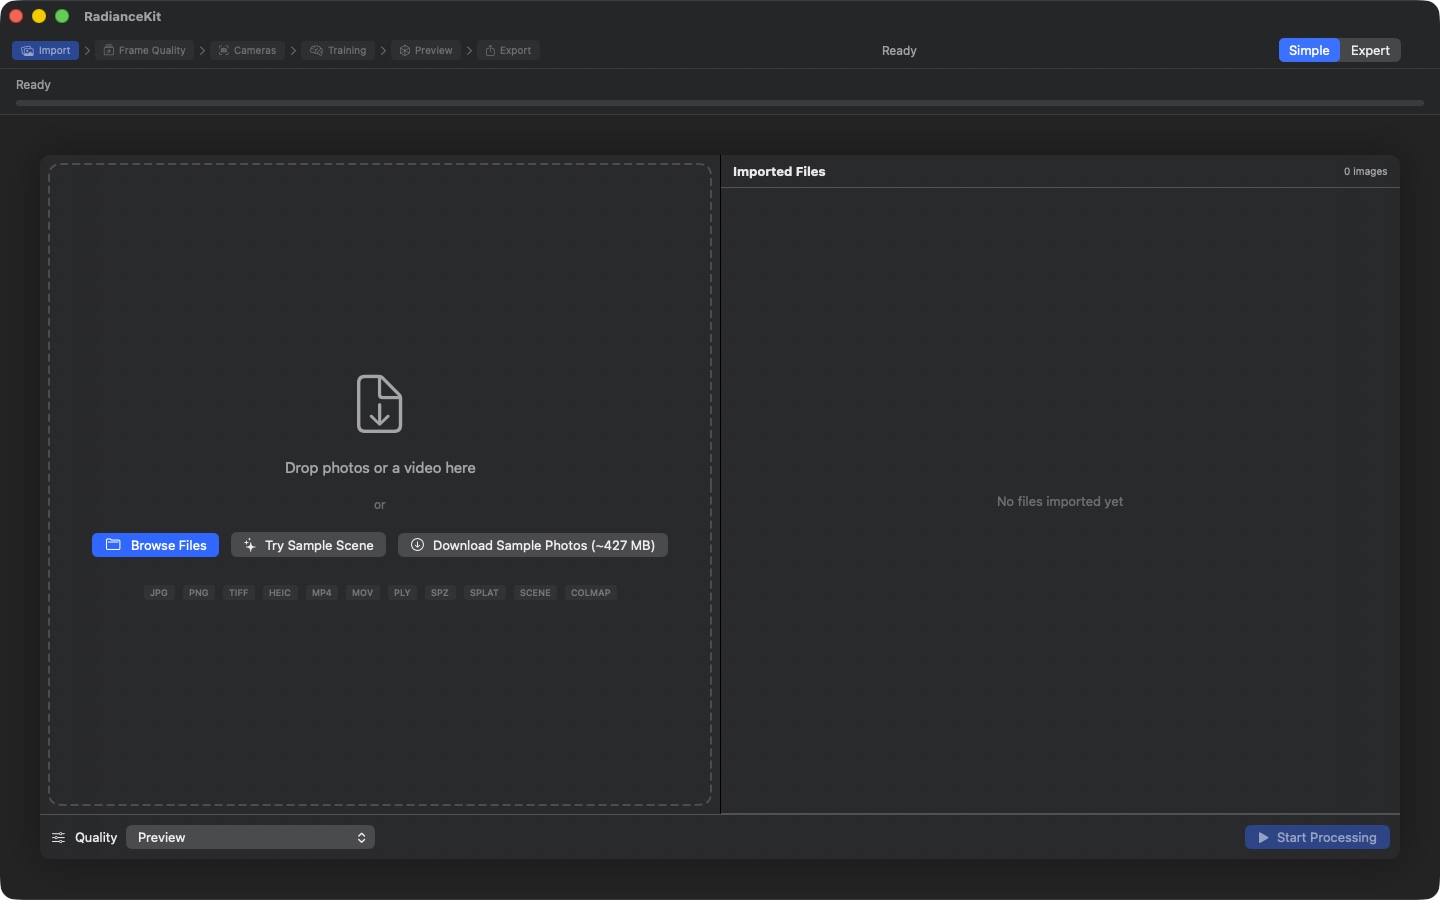
The step chain (Import active) shows the six stages of the workflow. Left drop zone with three CTAs: "Browse Files" (NSOpenPanel), "Try Sample Scene" (bundled demo), "Download Sample Photos (~427 MB)" (Mip-NeRF360 flowers subset). Format pills below list all accepted file types. On the right, "Imported Files" with counter "0 images" and empty state "No files imported yet". At the bottom, a quality picker (default: Preview) and "Start Processing" (disabled as long as no images are present).
The first step is to give the app some image material. Via drag and drop into the large dashed field in the middle, via the "Browse Files" button, or by clicking on the bundled sample scene. On the right a list of all imported images appears with resolution and file size; at the bottom, in the floating toolbar, you choose the quality preset and start the pipeline with "Start Processing". Validation warnings (red for < 3 or < 10 images, orange for 10–19) indicate whether the app expects a meaningful reconstruction or not.
C-01Step Chain (Stage Indicator)
WHERE
In the bar at the top edge of the window, to the left of the mode switcher. Only visible in Beginner Mode.
TECHNICAL
Shows the six stages of the pipeline as a chain of buttons lined up in a row, each with an icon and name, separated by an arrow character: Import → Frame Quality → Cameras → Training → Preview → Export. The current stage is fully colored, already completed stages are semi-transparent, stages not yet reached are gray. Already completed stages are clickable and jump back; the current stage and all stages not yet reached are disabled, as is the entire chain while processing is running. There is no longer a continuous percentage progress bar across the entire pipeline — the progress of the running stage is shown by the large circle on the processing screen (C-19).
C-03DropZoneView (Drag-and-Drop Area)
WHERE
Left side of the Import step, large dashed rectangle with icon. Shown in Beginner Mode with the label "Drop photos or a video here".
TECHNICAL
Drop area that makes the icon briefly bounce and colors the background as soon as drag items hover over the field. Accepts JPG, PNG, TIFF, HEIC, MP4, MOV, PLY, SPZ, .splat, .radiancescene bundles, and directories. Drop routing by type: images are collected and passed on sorted, videos trigger the frame-sampling path, splat files open the preview directly, and scene bundles are parsed. Directories are enumerated and all contained images are imported. Security-scoped bookmarks for sandbox-compliant access are correctly acquired and released. Unsupported extensions are shown as a warning banner for 5 seconds.
C-05Browse Files Button
WHERE
Inside the drop zone, prominent button.
TECHNICAL
Button that opens the macOS file dialog with multi-selection and the file types JPG, PNG, TIFF, MP4, MOV, folders, as well as the app's own scene format. Result URLs are security-scoped and are routed through the same import paths as drag and drop. If the user selects a folder, it is recursively enumerated for images.
C-06Try Sample Scene Button
WHERE
Inside the drop zone, only visible if the app bundle contains the sample scene and no images/splats have been imported yet.
TECHNICAL
Only appears if (a) a sample-scene.splat, .spz or .ply is present in the app bundle AND (b) no images/videos have been imported yet and no point cloud exists yet. When clicked, it loads the finished point cloud (preferring the smallest format — .splat ~3 MB, .spz ~1.4 MB, fallback .ply) and after 400 ms sets hardcoded camera values from the original metadata of the flower scene for an aesthetically pleasing initial perspective.
C-07Download Sample Photos Button
WHERE
Inside the drop zone, next to "Try Sample Scene"; same visibility conditions.
TECHNICAL
Downloads a sample set provided by RadianceKit from the internet: approximately 427 MB of 960 full-resolution frames, which are then unpacked and imported directly into the app. While another process is running, the button is disabled and the download does not start. Download progress is not shown in the interface as a percentage; you can tell the download is finished by the fact that the image list on the right fills up with the 960 frames.
C-09Quality Presets Picker
WHERE
Floating bottom toolbar of the Import overlay, to the left of the Start button.
TECHNICAL
Menu picker with the label "Quality" that groups the bundled presets into four sections by category: "Classic", "MCMC (fewer Gaussians, slower)", "Hybrid (sharp detail, compact)" and "Capture — curated real-world (Drone / 360° / Photo)". A fifth section, "Custom", is added once the full version has been unlocked and at least one custom preset has been saved. Locked state: all presets except Quick and Preview get a "🔒" suffix on the name if the user doesn't own the full version; selecting one snaps the picker back to Preview and automatically opens the purchase window. Choosing a preset applies it, replacing the entire training configuration.
C-10Start Processing Button
WHERE
Floating bottom toolbar of the Import overlay, to the right of the preset picker.
TECHNICAL
Button that stays gray as long as neither images nor a video have been imported. Clicking it starts the pipeline and switches the stage machine into the sequence Frame Quality → SfM → Training. The button itself has no further status; a running process instead appears as a separate processing screen.
C-11Video Sampling Slider
WHERE
Right-hand image list, visible only if a video (instead of images) was imported.
TECHNICAL
Slider from 0.5 fps to 30 fps in steps of 0.5. When changed, the frame density is updated and additionally the number of target frames (at least 10) is calculated from density and video length. The slider sits outside the image list because list items would block mouse events from sliders. Below the slider are the calculated target frames ("247 frames") and the video length ("1m23s video"). Tooltip warns: "Doubling the density doubles the number of frames and increases SfM time by ~100%."
C-12Clear All Button
WHERE
Right-hand image list, bottom right; visible only if images have been imported.
TECHNICAL
Red button. Clicking opens a confirmation dialog with the title "Clear all imported files?" and the message "N images will be removed.". Confirming clears all imported images/videos, staging directories, the point cloud, the training status, the SfM result, and all caches; the stage jumps back to Import. On Cancel, everything is preserved. The dialog is configured as a non-destructive default path (destructive button marked red).
C-13File List ForEach (Removing Individual Images)
WHERE
Right-hand image list, each entry.
TECHNICAL
List of the imported images with swipe-to-delete. Each image gets a row with an icon, file name, resolution ("1920 × 1080"), and file size (formatted KB/MB). Resolution comes from a metadata cache that is filled asynchronously from the image headers so the interface doesn't block. Removal happens via the macOS-typical swipe-delete (trackpad swipe to the left on a row); the list has no row selection, so there is no keyboard delete here. Note: The extended image-delete path with an explicit minus button, backspace, and Cmd-Z to undo was only added in Expert Mode in the Project Navigator — in Beginner Mode it remains swipe-delete only.
C-15Validation Warnings (3-Tier)
WHERE
Below the image list, above the Clear All button.
TECHNICAL
Three consecutive thresholds based on the number of imported images (only active if images are present and there's no video): - < 3 images: red banner (red octagon), text "At least 3 images are required. Camera alignment cannot be computed from fewer images." - 3–9 images: red banner, text "With fewer than 10 images, SfM often fails and the trained scene tends to overfit […]. 15–20 images minimum recommended; 30+ for object captures." - 10–19 images: orange banner (warning triangle), text "Workable, but quality usually improves with 20+ images and good coverage around the scene."
From 20 images onward, the banner disappears. Threshold values are hardcoded and based on empirical experience from 560+ training experiments.
C-16COLMAP Workspace Detection
WHERE
When a folder is dropped — no visible button, just detection logic.
TECHNICAL
When a directory is dropped, it is checked whether it contains one of three canonical workspace layouts: sparse/0/cameras.bin, sparse/cameras.bin, or directly cameras.bin in the root. If so, the standard image enumeration is aborted and instead a modal alert opens, asking the user whether the existing reconstruction should be used, or whether the images should be sent through Apple Photogrammetry again. Same path also applies for text-format workspaces (cameras.txt) and ETH3D exports. See chapter 9, Backend Q6, for details. Works the same in Beginner Mode as in Expert Mode.
When to move to the next stage?
You can click Start Processing as soon as (a) at least one image or one video has been imported and (b) the validation banner is orange or gone. With a red banner, the app still lets you start, but you'll most likely cancel the process again right away. Recommended: at least 20 images, sharp, with clear overlap between consecutive shots, all taken from about the same distance to the subject. Before starting, choose a preset that fits your time budget — with 30 images and the Quick preset you're done within a few minutes, with Quality it's more like 1–2 hours.
Z2 — Processing (SfM + Training)
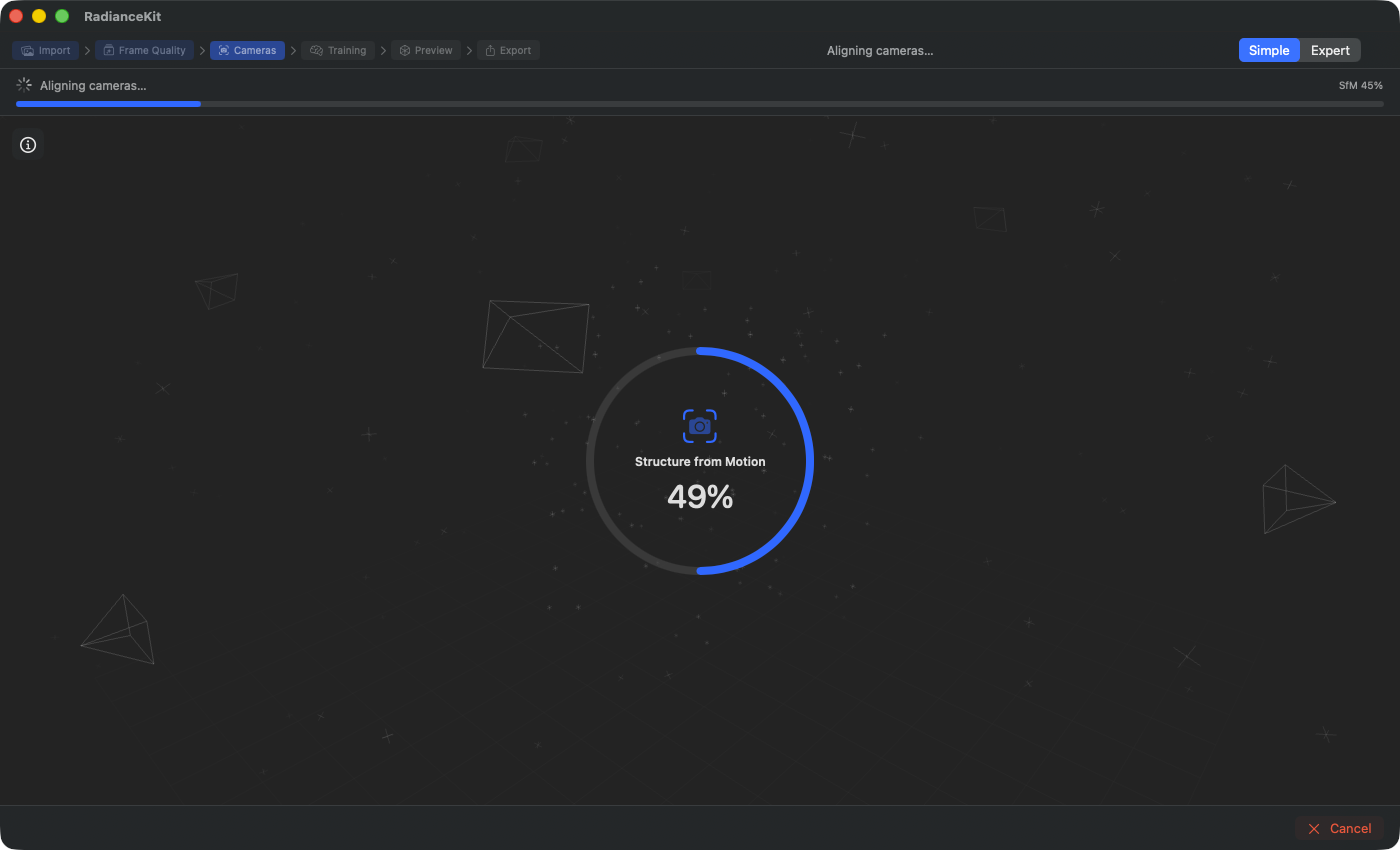
SfM phase (cameras are being aligned): The large progress circle shows the progress of the current stage (here 41% of the Apple Photogrammetry session). The step chain at the top marks "Cameras" as the active stage. Floating wireframe cameras in the background hint that poses are being estimated. (This screenshot is from an older app version and still shows an overall progress bar and a status text at the top; both no longer exist.)
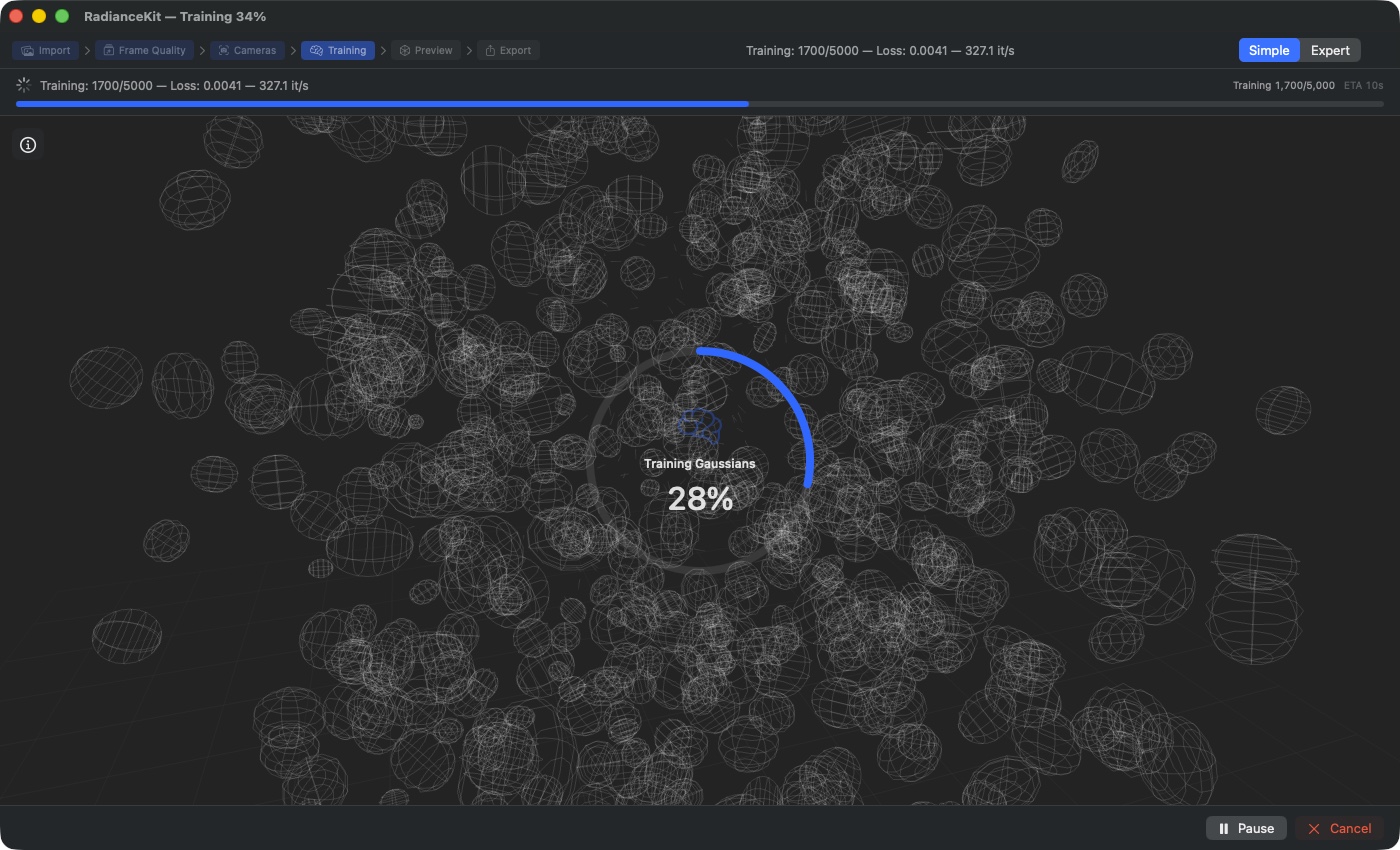
Training phase (Gaussians are being optimized): The stage icon switches to "Training Gaussians"; during training the circle shows the iteration counter (here 400 / 5,000 for the Preview Preset), not a percentage. The overlaid info panel shows the loss value (0.1642), iterations per second (138.7 it/s), and remaining time (33 s). The Pause button (not present during the SfM phase) lets you resume later; Cancel discards the training result and returns to import.
Once the pipeline is running, the app hides the import overlay and shows a full-screen processing screen. In the center runs a large progress circle (220 × 220 pixels) with stage icon, status text, and percentage number; in the background a subtle splat animation symbolically visualizes the ongoing computation. In the top left you can toggle an info panel that shows live metrics from training and SfM. At the bottom there's Pause/Resume, Cancel, and in case of an error a Retry button.
C-18SplatTrainingView (background animation)
WHERE
Full-screen background behind the progress circle, hidden on cancellation or error.
TECHNICAL
Decorative animation that renders an increasing number of small animated splat particles depending on pipeline progress (0…1). The source is a computed progress value that maps SfM phases to 0–0.2 and training to 0.2–1.0 (frame quality to 0–0.05). This makes the splats visibly "build up" as training runs. Purely decorative — the display shows no real intermediate results of the current training run (that would be Live Preview in Expert Mode). On cancel or failure it is hidden and only the status circle remains visible.
C-19Large progress circle
WHERE
Centered on the processing screen, 220 × 220 pixels.
TECHNICAL
Two rings rendered on top of each other: an outer muted track ring, and an inner filled progress ring with an accent or red stroke (red on error). The ring directly follows the actual progress of the current stage (smoothed via a brief fade-in/fade-out animation), so the display matches the progress line in Expert Mode. Inside the circle is a stage icon (brain for training, camera for SfM, film for video frame extraction, sparkles for the frame quality check, globe for unwrapping 360° material), stage title, and the progress number. This number is the iteration counter ("12,500/20,000") during training, and a percentage in all other stages. The icon pulses gently as long as processing is active. On error the title switches to the failed stage ("Structure from Motion Failed", "Training Failed"), and the ring and number turn red. After a cancellation the circle instead shows an orange cross with "Cancelled!".
C-22Info button (show metrics)
WHERE
Top left on the processing screen, 32 × 32 pixels.
TECHNICAL
Simple button with a material background. Toggles the info panel on or off. Icon switches between an info-circle outline and a filled info-circle when active. Gentle fade-in animation. In the tooltip: "Show detailed processing metrics".
C-23Info panel (live metrics)
WHERE
Bottom left on the processing screen, visible only when processing details are shown.
TECHNICAL
Two-column panel with an ultra-thin material background. Left column: stage-specific info lines — for SfM the status text and percentage; for training the iteration, combined loss, L1 loss, D-SSIM loss, Gaussian count (colored orange), speed (it/s), elapsed time, computed ETA, SH degree, and learning rate. Right column: status text, time-info string, an inline loss chart (see C-28), and a discoverability nudge (see C-32). All values are read from the training status, which is updated on every training tick.
C-25Pause/Resume button
WHERE
Bottom navigation bar, visible only during the training stage (NOT during SfM) and only while processing is running.
TECHNICAL
Bordered button. Calls pause or resume depending on status. Label switches between "Pause" (with pause icon) and "Resume" (play icon). During the SfM step the button is not shown, because Apple Photogrammetry has no pause semantics. The paused state fully preserves iteration, Gaussian status, and optimizer momentum — Resume continues exactly where it left off.
C-26Cancel button
WHERE
Bottom navigation bar, visible while processing is running (SfM or training).
TECHNICAL
Red bordered button. Opens a confirmation dialog titled "Stop and discard progress?", with buttons "Discard Progress" (destructive) and "Keep Running" (cancel). On confirmation the cancel flag is set, the training task is ended, the SfM subprocess is terminated if necessary, and a summary line with the cancellation status is written to the JSONL log. Unlike Pause, the training buffer and status are discarded.
C-27Retry button
WHERE
Bottom navigation bar, visible when the pipeline has failed (SfM status starts with "SfM failed" or training is in an error state).
TECHNICAL
Accent button. Restarts the entire pipeline. Before starting, it checks whether imported images/videos are still present. Previous error logs remain in the JSONL directory; a new run writes a new log file with the current timestamp.
C-28Inline loss chart
WHERE
In the info panel, right column, visible only during training with a non-empty history.
TECHNICAL
Compact drawing area (40 pixels tall), draws the loss history as a 1-pixel line in the accent color. Data is filtered to finite values (NaN protection for unstable training runs). Min/max are computed over the entire history — so the chart auto-zooms to the current value range. The last loss value appears in the top right above the chart. The history itself is built up in the app state on every training tick (typically every 100 iterations).
C-32Discoverability nudge (Expert Mode hint)
WHERE
In the info panel, bottom right column, visible only during training AND in Beginner Mode.
TECHNICAL
Small line with an eye icon and caption text "Switch to Expert Mode (⌘2) for live splat preview", in a subdued tone and 10-point font. Not an interactive element, just a hint. Does not respond to clicks — the user must actually press Cmd+2 or click the Mode → Expert Mode menu.
When do you move to the next stage?
The app automatically switches to Z3 (Preview) once training has completed successfully — you don't need to click anything. The bottom navigation bar then switches from Pause/Cancel to a Back button (back to import) and an Export button (forward to export). In case of an error (red error message, stage icon is an X), Retry appears instead, and you have to decide whether to start again or go back to import with Back to change your image material.
Z3 — Preview (Rotate 3D Model)
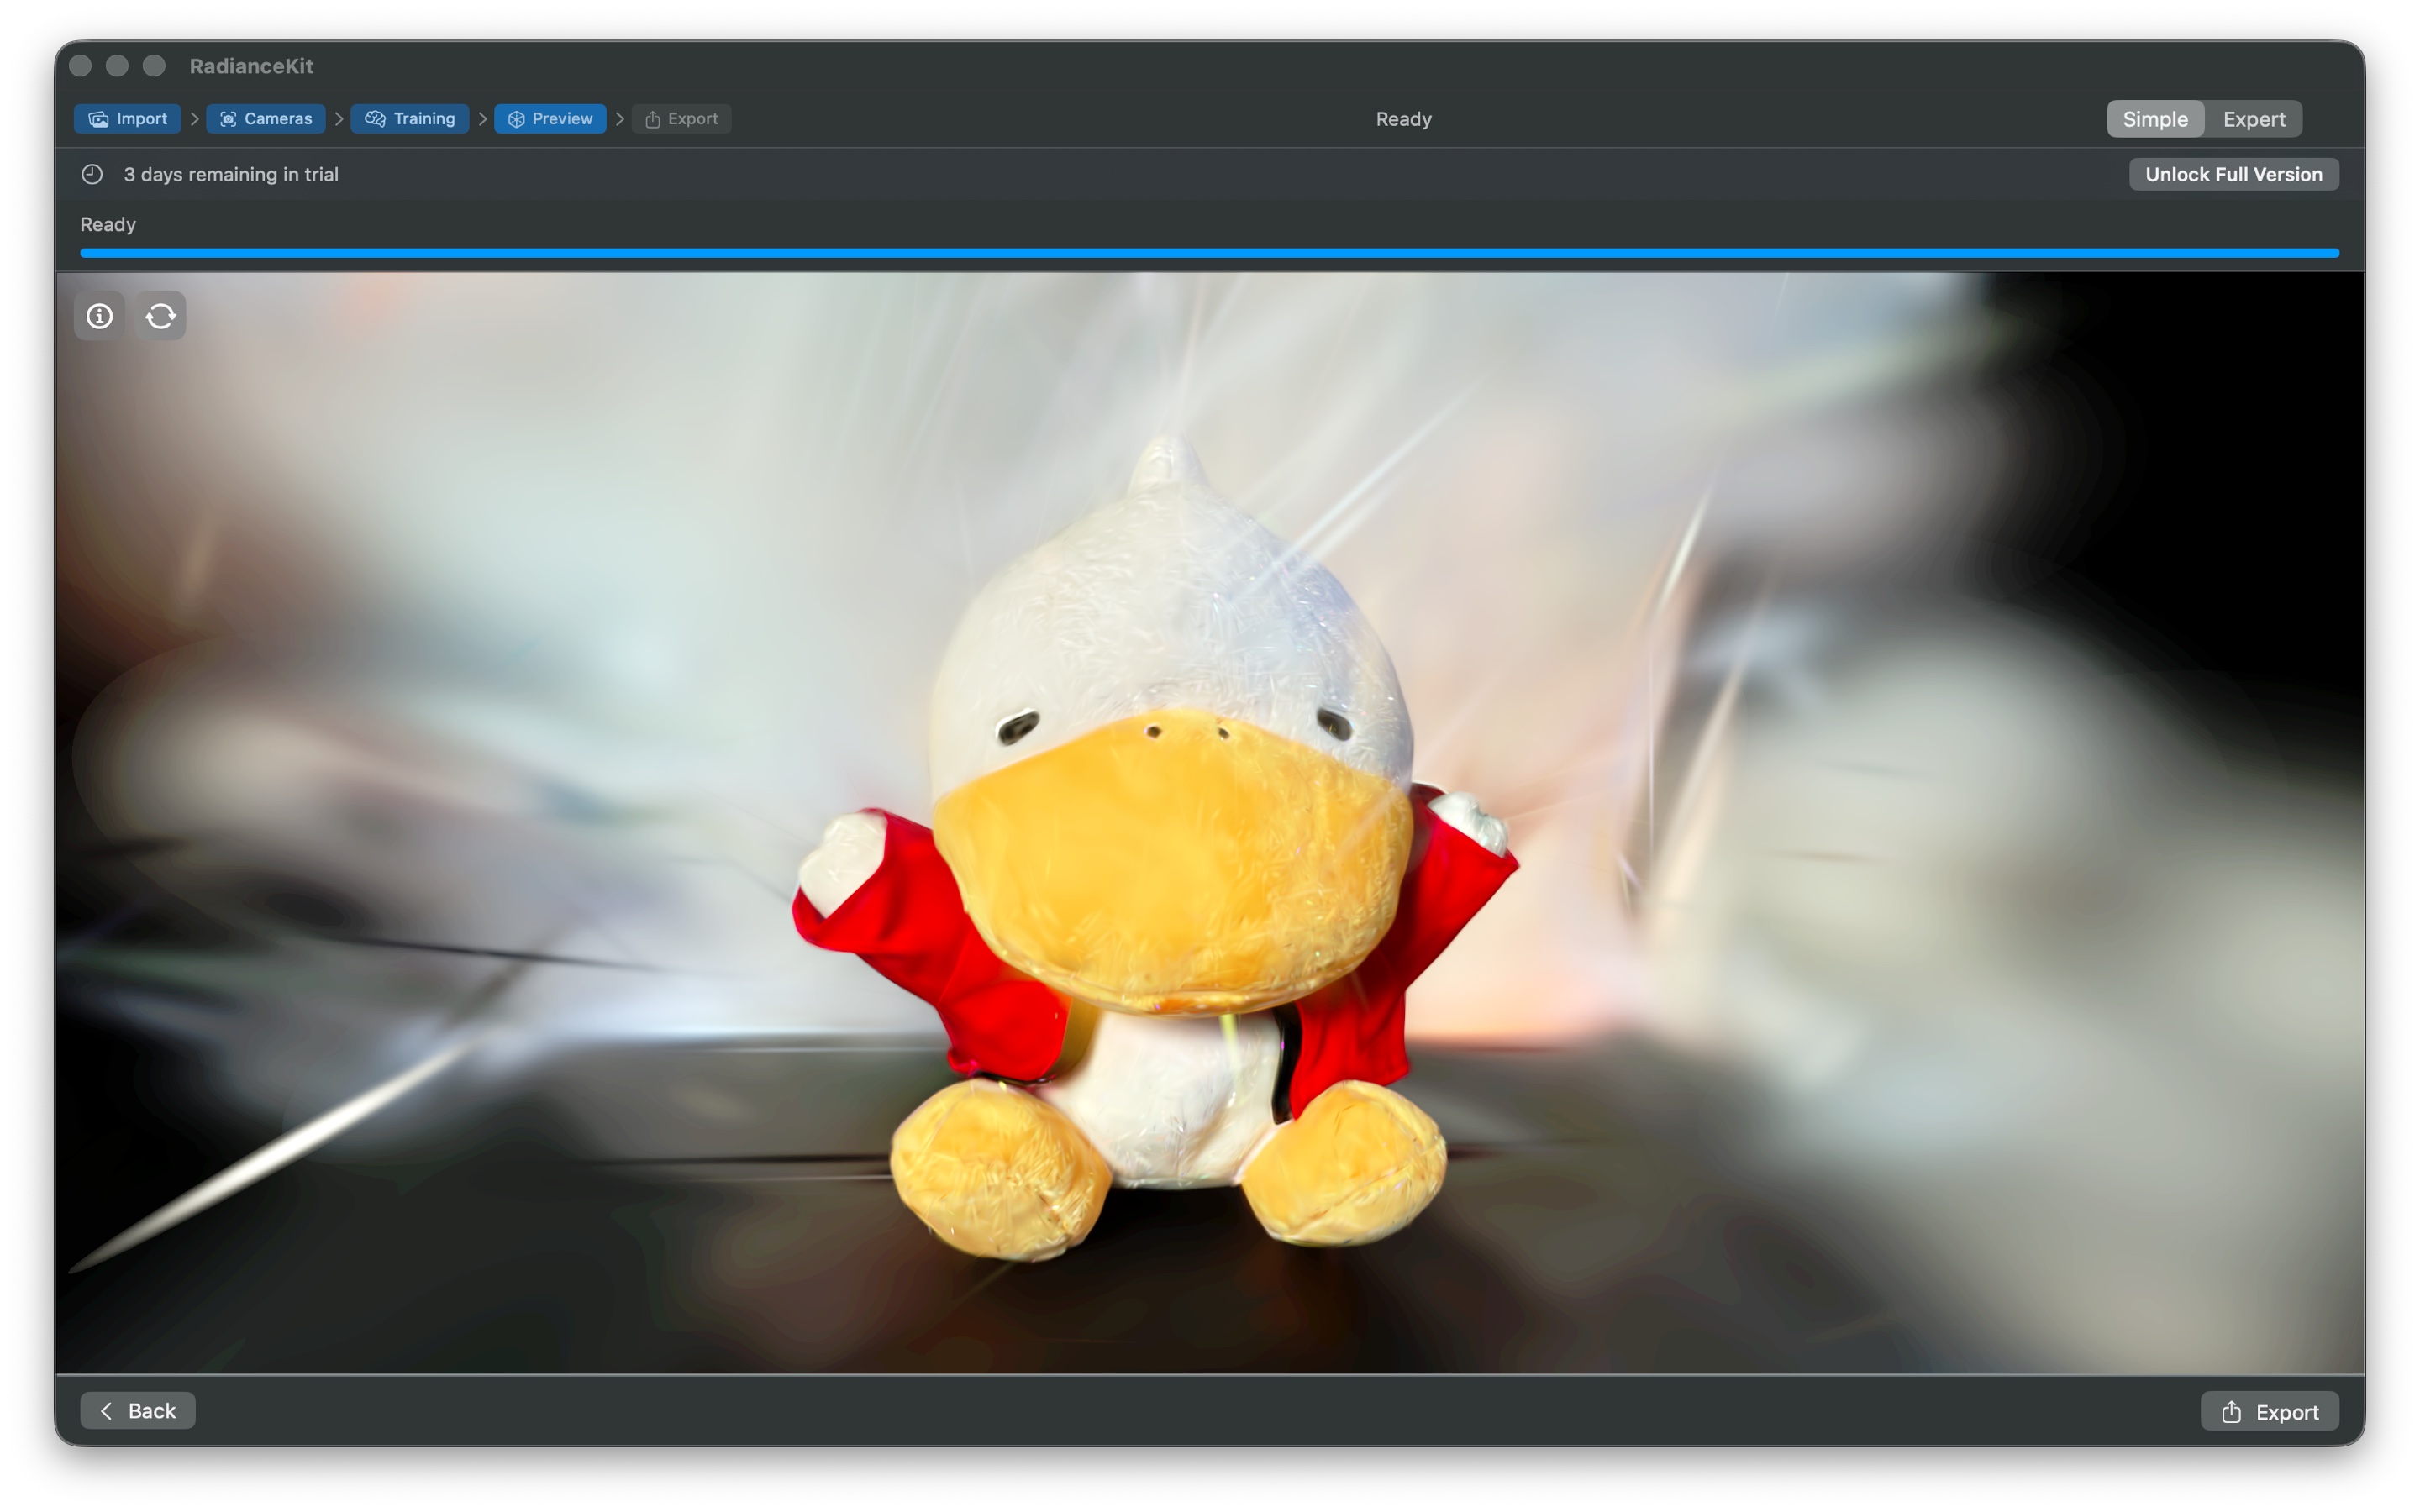
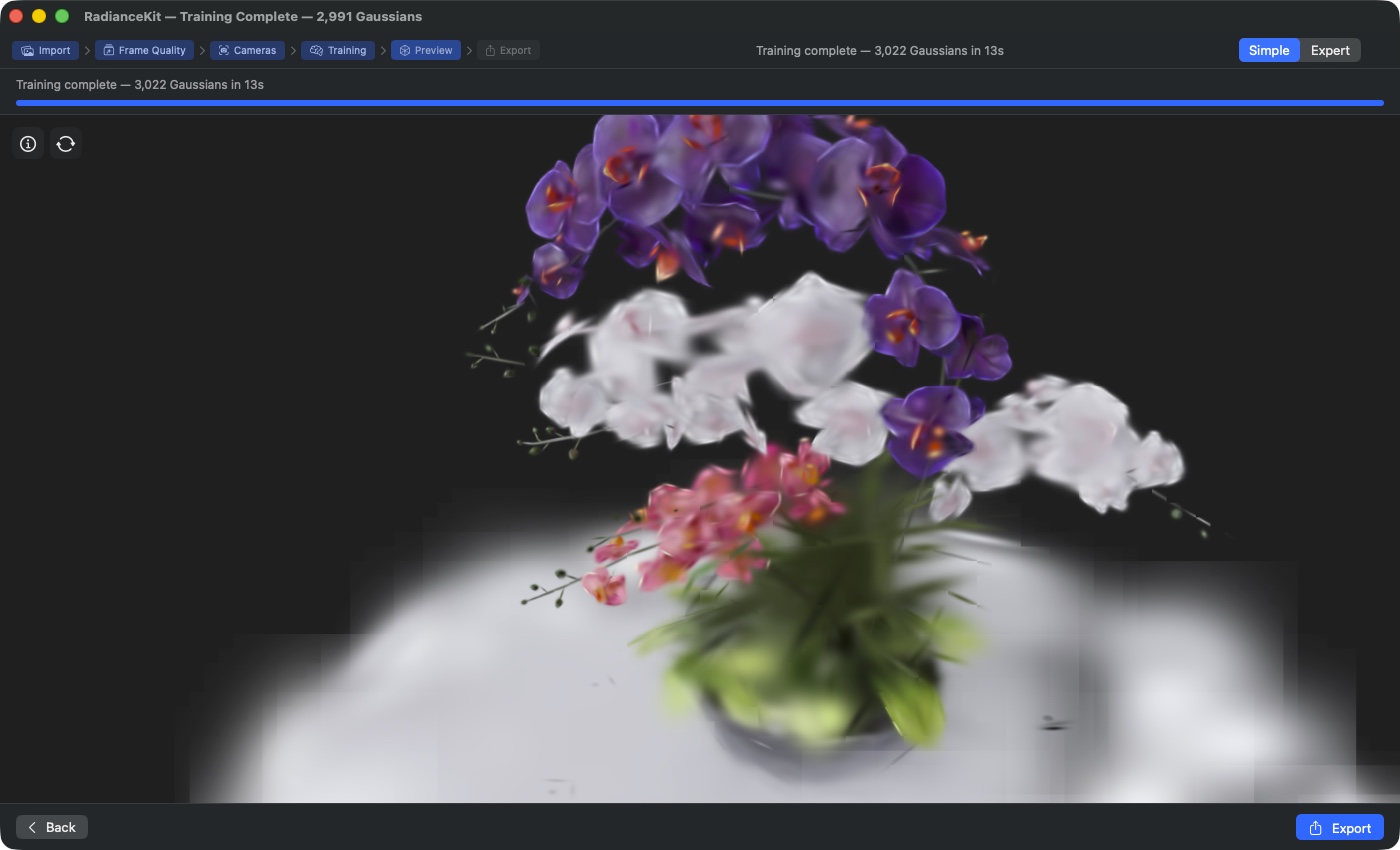
The step chain marks "Preview" as the active stage. Full-screen 3D viewport renders the fully trained bouquet scene (synthetic Blender test set by Bjoern, 60-frame subset from 960 hemispherical cams). Header status bar: "Training complete — 3,022 Gaussians in 13 s" — shows the final Gaussian count and training time. Dragging in the viewport rotates the camera (yaw/pitch); the scroll wheel zooms along the view direction. The "Back" button (bottom left) returns to Z2 for resuming or re-running; the "Export" button (bottom right, primary) moves on to Z4.
Once training is finished, the app automatically lands in the preview. Here you see your finished Gaussian Splatting model in a fullscreen Metal view and can rotate, zoom, and pan it with mouse and trackpad. At the top left are two small overlay buttons (info panel and camera mode), and at the bottom left the expandable info panel with training statistics. Everything else about the view — auto-rotation, resetting the camera, background color, screenshot — can be found in the "Viewport" menu. Before the next step (export) it's a good idea to check the model from various angles, to make sure the reconstruction is clean.
C-36SplatViewportView (main 3D view)
WHERE
Full-screen background of the preview step.
TECHNICAL
Metal-based 3D viewport that renders the finished point cloud. The renderer is RadianceKit's OWN ForwardPass rasterizer — the same one that already renders the splats during training — so it's genuine WYSIWYG (what is trained is displayed and exported exactly as such). Tile-based rendering pipeline with order-independent transparency. If the renderer cannot be initialized (e.g. because Metal is not available on the system), a black background with "Metal not available" text appears instead. The view ignores the safe area, so the model reaches all the way to the window edge.
C-37Viewport overlay (info and camera mode)
WHERE
Floating over the viewport: two icon buttons at the top left, with the info panel below them at the bottom left.
TECHNICAL
The overlay consists of exactly two buttons: "Scene Info" shows and hides the info panel at the bottom left, the second toggles the camera mode between "Orbit" (circling around a target point) and "Fly-Through" (free flying). The info panel shows frame rate, Gaussian count, camera mode, field of view, render resolution, and sampling; during an active training run, a training status line is added, and after it ends, a completion line. Failed or ongoing scene loading processes are shown as their own status line independently of the info toggle. Auto-rotation, resetting the camera, background color, and screenshot are not overlay buttons but entries in the "Viewport" menu.
C-38Export button (navigation bar)
WHERE
Bottom navigation bar in Z3.
TECHNICAL
Accent button with the label "Export" and a share icon. Clicking triggers the switch to Z4. Beforehand the parent view checks whether the full version is unlocked — if not, the lock view is shown instead of the export stage (see U-06).
When to move to the next stage?
Before exporting, rotate the model all the way around once and check: Are all the areas that you covered in your input images present? Are there floating "floaters" (Gaussian splat clouds floating freely in the air)? Does the background/sky look clean or smeared? Serious problems can only be fixed by re-training — either with more images, a different preset, or in Expert mode with floater reduction settings.
Z4 — Export (Choose Format & Save)
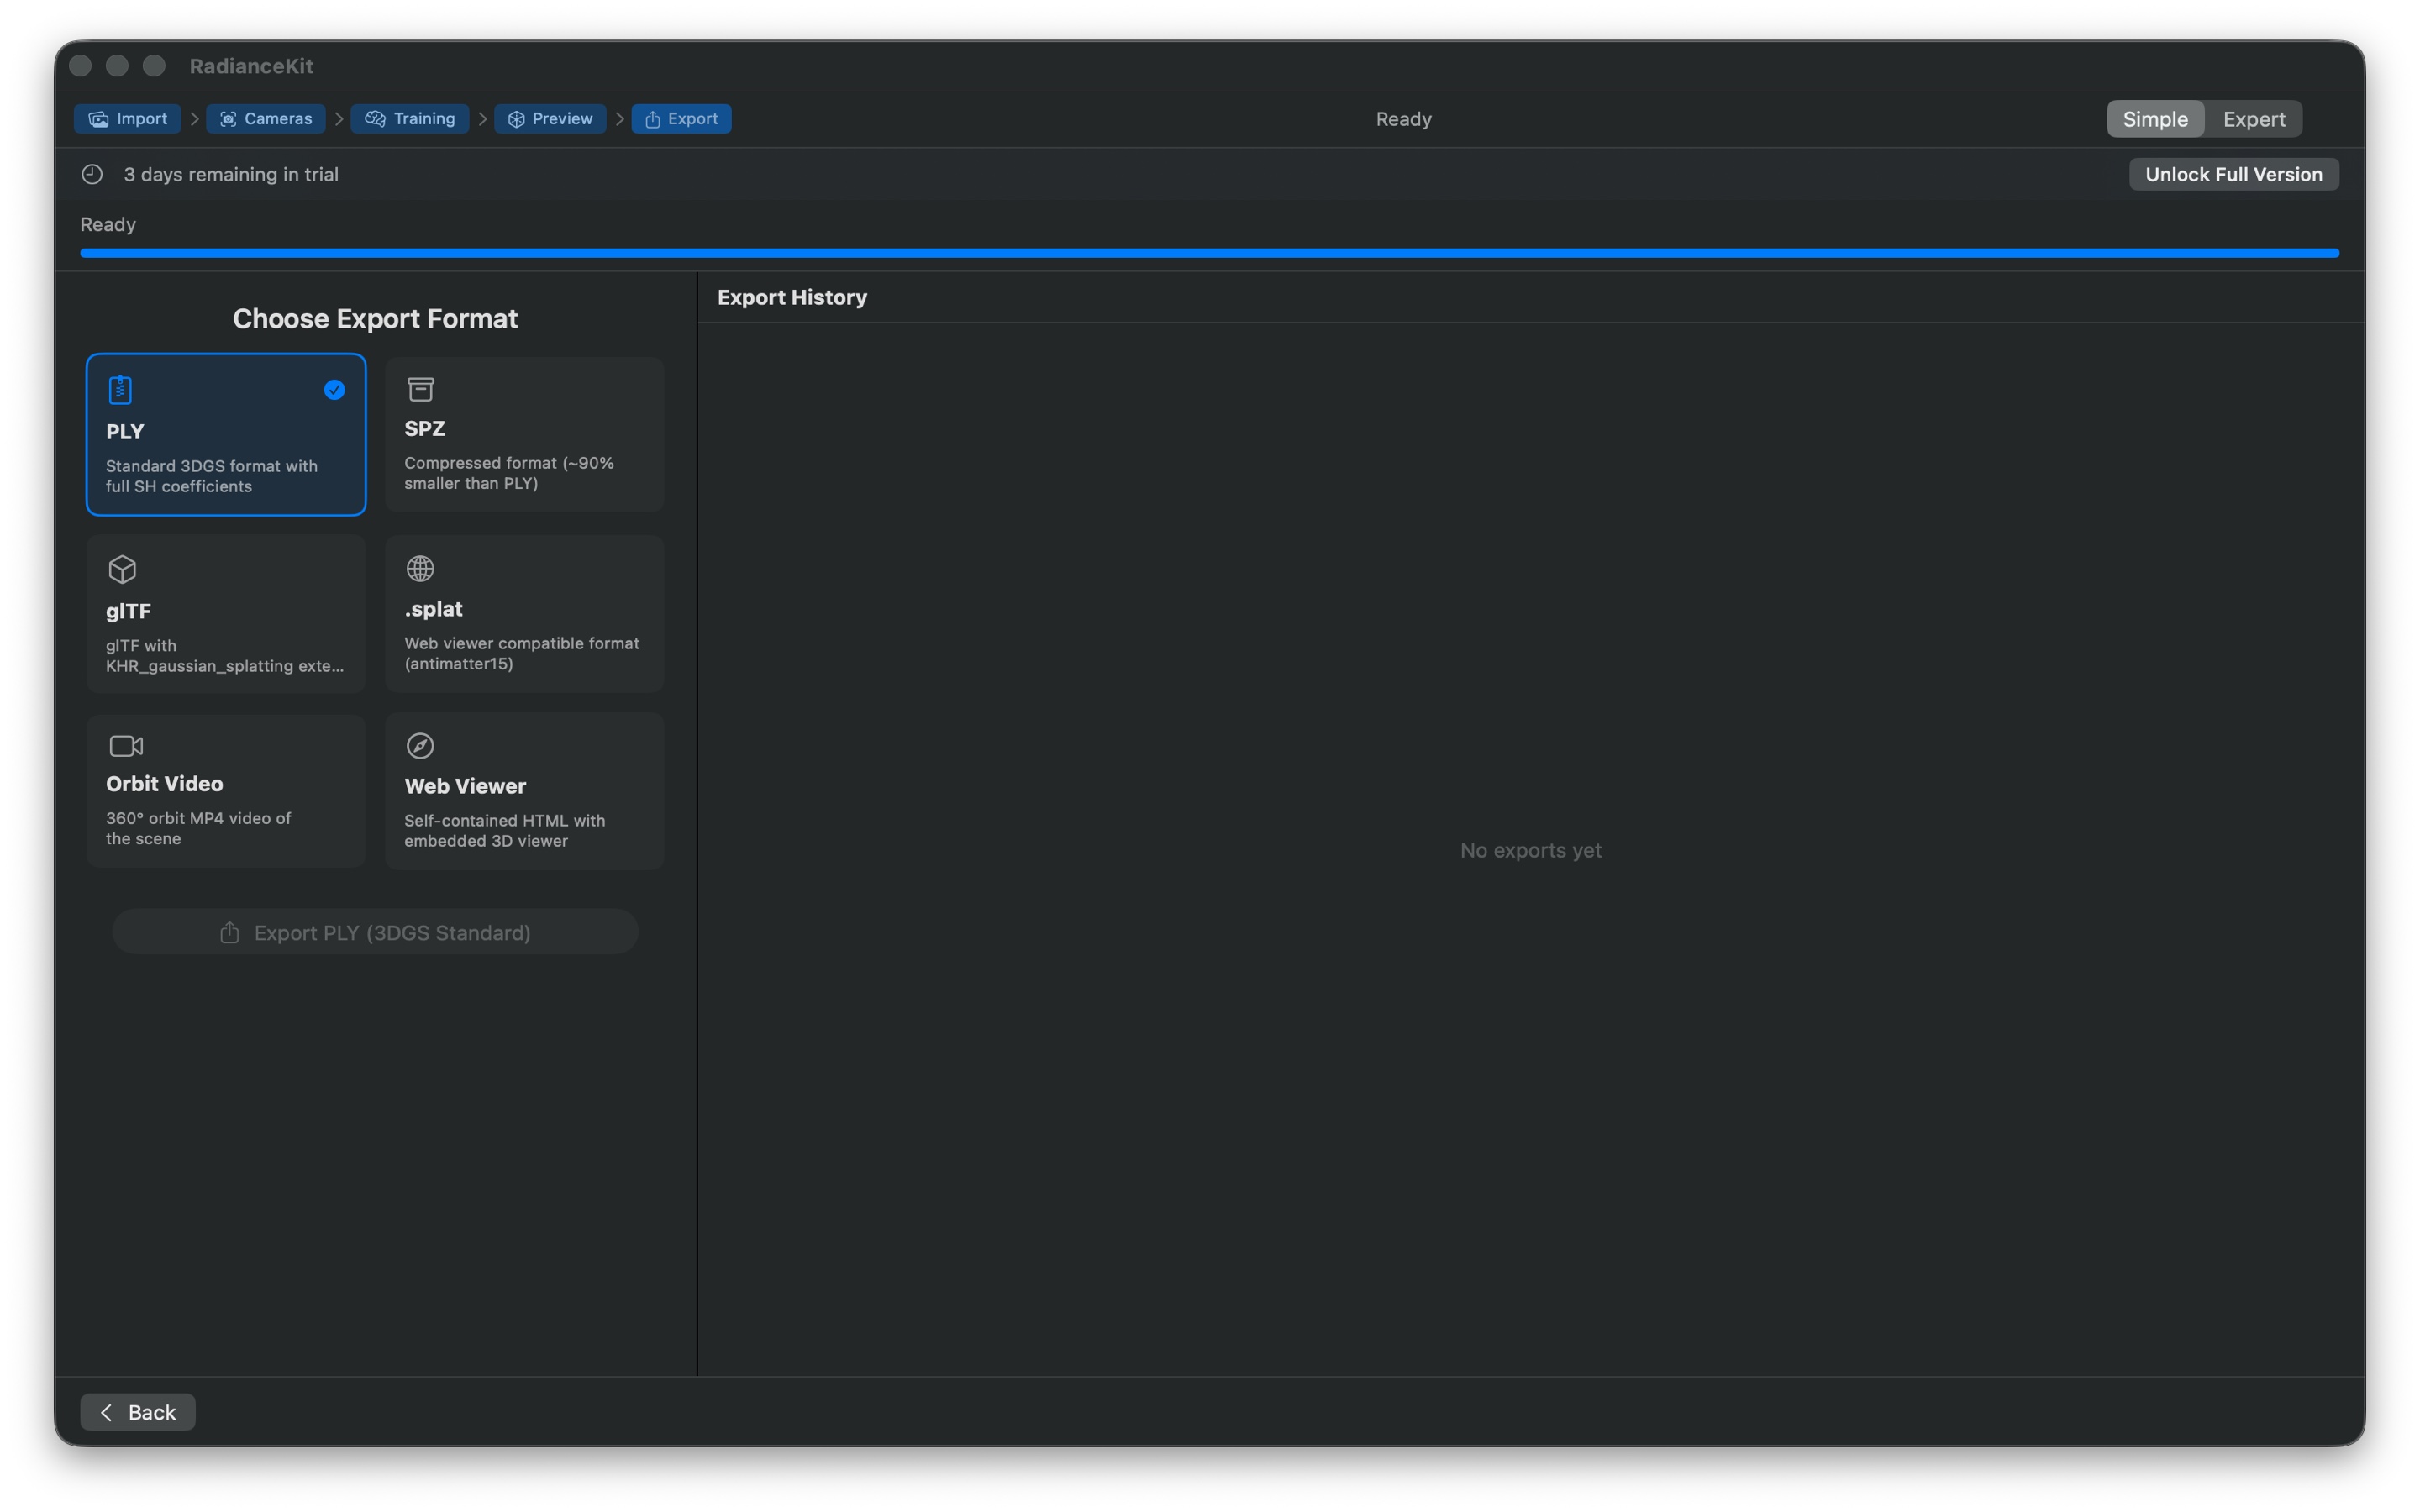
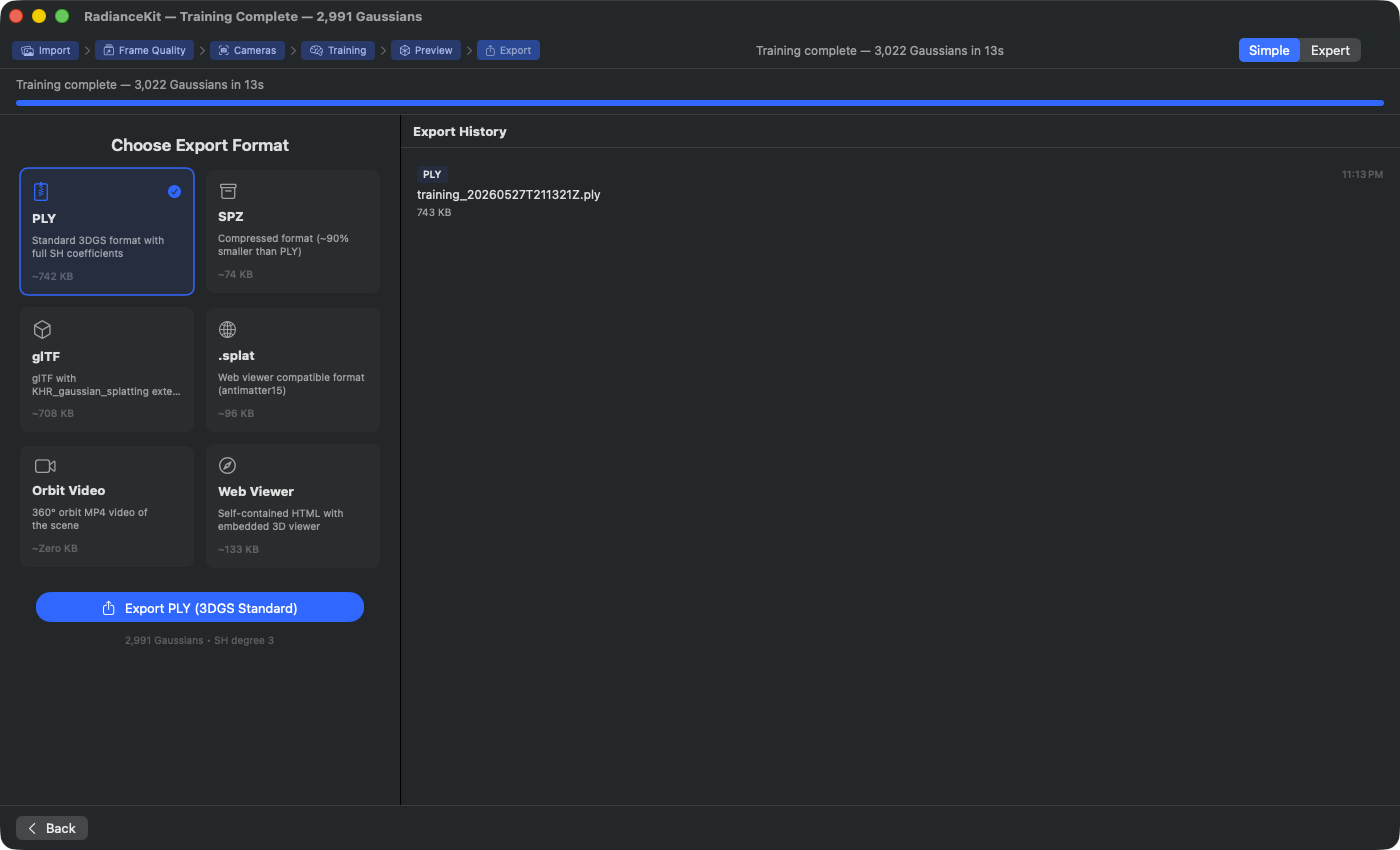
The step chain marks "Export" as the active stage. The card grid on the left, "Choose Export Format", shows all six options: PLY (standard 3DGS, 742 KB, with full SH coefficients — preselected here with a blue checkmark), SPZ (compressed 3DGS format, ~90% smaller than PLY, 74 KB), glTF (with KHR_gaussian_splatting extension, 708 KB), .splat (web-viewer-compatible via antimatter15, 96 KB), Orbit Video (360° MP4 of the scene, live size calculation), Web Viewer (standalone HTML with embedded 3D viewer, 133 KB). Size figures are calculated live from the current Gaussian count and format overhead. On the right, "Export History" lists already-completed exports with format pill, file name, and timestamp — clicking reveals it in Finder. Primary CTA at the bottom left: "Export PLY (3DGS Standard)" with the Gaussian subtitle "2,991 Gaussians · SH degree 3".
In the last step, you choose from 6 export formats (PLY, SPZ, glTF, .splat, orbit video, web viewer) via a 2-column card grid, click Export, and select a save location in the macOS dialog. On the right, a history of all previous exports runs — when selecting a card, the estimated file size is displayed immediately below it, so you can, for example, prefer SPZ when you want to publish on the web (small), and PLY when you want to import into another piece of software (SuperSplat, Postshot, Blender via plugin) (large and complete).
C-392-Column Format Grid
WHERE
Left main area of the export step.
TECHNICAL
Card grid with two flexible columns and 12-point spacing. Iterates over the formats offered in Beginner mode — a filtered subset of the full format list containing only the 6 most important formats: PLY, SPZ, glTF, .splat, orbit video, web viewer. The remaining formats are only offered in Expert mode.
C-40Format Card Button
WHERE
Each card in the grid.
TECHNICAL
Simple button with card layout: icon (e.g., a document zipper for PLY, an archive box for SPZ, a video icon for orbit video) on top, format name as headline, description caption (truncated to 2 lines), below that the estimated file size (calculated live from format, Gaussian count, and SH degree, and formatted as KB/MB). Clicking selects the format. The selected card gets an accent background, accent border, and a checkmark icon in the top right. The tooltip is the format description.
C-41Video Duration Slider
WHERE
Below the format grid, visible only when a video format is selected (orbit video or social video).
TECHNICAL
Slider 3–30 seconds in 1-second increments, bound to the video length in app state. Maximum width 300 pixels. Only shown when a video format is selected. For non-video formats, the slider is completely removed from view — no dead space.
C-42Export Button
WHERE
Below the format grid (and below the duration slider, if a video is selected).
TECHNICAL
Large accent button. Label: "Export {Format Name}", share icon. Clicking opens the macOS save dialog with the file extension matching the format. The suggested file name comes from the current scene's name; if none is set (e.g., because the scene has never been saved), it reads "scene". Upon confirmation, the export is written to the chosen location. Disabled when no training result is available or an export is already running. Below the button is the result's key figure ("2,991 Gaussians • SH degree 3").
C-43Export Progress Bar
WHERE
Below the export button, visible only while an export is running.
TECHNICAL
Progress indicator with max width 300 pixels, below it a caption "Exporting… N %". The value runs from 0 to 1 and is updated during writing — for PLY in chunks of 10,000 Gaussians, for SPZ once after quantization, for orbit video at frame intervals.
C-44Export Error Display
WHERE
Below the progress bar, visible only if an error occurred during the last export.
TECHNICAL
Red line with a warning triangle and the text "Export failed: …" along with an error description. Red background with 8% opacity, rounded corners. Max width 400 pixels. Common error causes: write errors due to a full disk; sandbox errors for save destinations outside the permitted range.
C-46Export History List
WHERE
Right side of the export step.
TECHNICAL
List of the export history (stored permanently in the app settings, updated after every successful export). Each row shows a format badge (small, accent-colored), timestamp (HH:mm), file name (truncated to 1 line), and formatted file size. Clicking a row opens Finder with the selected file. Empty state: "No exports yet".
C-48History Context Menu (Right-Click)
WHERE
Right-click on a history row.
TECHNICAL
Context menu on each list entry with two actions: "Reveal in Finder" (opens Finder with the selected file, like a simple click) and "Copy Path" (places the full file path as text on the clipboard). The latter is useful for drag-and-drop into other apps or for passing to the command line.
When is the workflow complete?
After a successful export, you have your 3D model as a file on disk and the history shows a new entry. There is no "Done" button — you can append as many exports as you like in different formats without retraining. If you want to go back to the preview (e.g., to check a camera perspective again), use the back button in the bottom navigation bar or click "Preview" at the top in the step chain. If you want to start a completely new scene, go back to the import step and use Clear All there, or File → New Project (Cmd+N).
Switching to Expert Mode
Press Cmd+2 at any time, choose Mode → Expert Mode, or click "Expert" in the mode switcher at the top right. The entire state is preserved: imported images, selected preset, running or finished training, completed point cloud, export history, even the current stage. In Expert Mode, the full Inspector sidebar is shown instead of the step stage. In particular: the Project Navigator (see chapter 2) offers the advanced image operations (minus button, backspace delete, Cmd-Z undo, Quick Look preview with the spacebar), the live preview in the viewport during training, as well as all Loss, MCMC, Densification, and Mip-Splatting parameters. Cmd+1 switches back to Beginner Mode — that, too, loses no state.
Frequently Asked Questions
Why does my Start Processing button stay greyed out?
You haven't imported any images or a video yet. Drag at least one file into the drop zone or use "Browse Files". As soon as the images list on the right contains at least one entry, the button becomes active. (With only 1–2 images it will start, but SfM will fail immediately with an error — see the red validation banner.)
Why is my export button locked?
In beginner mode there are two levels: (a) If the training pipeline isn't finished yet and there's no point cloud available, the button is disabled — you have to complete processing first. (b) If you haven't purchased the full version yet, you'll see a lock view with a lock icon instead of the export stage, with the message "Export requires the full version" and a button "Unlock Full Version" that opens the purchase window. Quick and Preview Presets allow training for free, but export is Premium.
Why can't I select a Preset?
You can select it — but if you tap a Preset marked with a lock icon without having purchased the full version, the picker automatically jumps back to Preview and the purchase window opens. Only Quick and Preview can be used for free; all other Presets (Balanced, Quality, as well as all entries from the MCMC, Hybrid, and Capture sections) belong to the full version.
Why is my drop zone empty and dashed grey even though I'm dragging images into it?
Probably a UTI type mismatch. The app accepts JPG, PNG, TIFF, HEIC, MP4, MOV plus the app's own splat formats. Other image formats (BMP, GIF, WebP, RAW formats) are NOT recognised. If you're sure your image type should be supported, check the file name extension — the app primarily goes by extension, not by file content.
Why does SfM take so long even though I only have 30 images?
Apple Photogrammetry doesn't scale linearly — with certain image constellations (interiors with complex textures, motion blur, poor lighting) it can take significantly longer than the image count would suggest. If SfM is still stuck after 10+ minutes with 30 images, cancel and try again with better material, or switch to Expert mode and try COLMAP/Native SfM (Cmd+2 → Inspector → Camera Alignment).
Where can I find my training logs?
Help → Open Training Logs (Cmd+⇧+L). This opens ~/Documents/RadianceKit/Logs/. Each training session writes its own JSONL file with a timestamp in the file name — the first line is the configuration, followed by a progress line every 100 iterations, and the last line is the summary with the final loss and success flag.